
10.6 miles 758 m 6h 12m
Cairnholy-Barholm Hill-Ben John-Cairnharrow-Cambret Hill
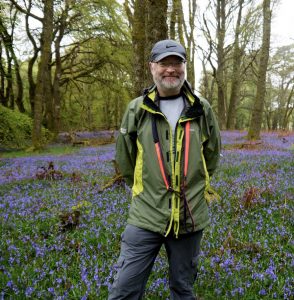
Despite having to defrost the car, and turning up in cold weather gear, most of this walk was tee-shirt weather.
I parked at Cairnholy where there is space for two, perhaps three, cars and had a wander about the 5000 year old chambered cairns of Cairnholy I and Cairnholy II before hitting the hills.
Negotiating Cairnholy Farm was my first task. I didn’t want to go wandering through the farm’s private areas so picked my way along a slurry filled track, past some bemused sheep and headed down the slope to Kirkdale Burn. There is a ford which is obviously in use since either side of it has boot sucking churned mud. A little frost here would have helped.
There was no obvious path or track so I just made my way up towards Barholm Hill, cutting across the track to Claughreid. I couldn’t see any nearby gates in the fence so climbed rather gingerly over the first of many barbed wire topped fences. By the end of this walk I had become a dab-hand at barbed wire, using my OS map as protection.
The climb up Barholm was easy going, with great views over Wigtown Bay, Fleet Bay’s Islands in the foreground and the Isle of Man on the horizon. I had originally intended to go from Barholm Hill to Cairnharrow but Ben John sat there tempting me across. Perhaps the view down its far side would be worth a photo? I succumbed.

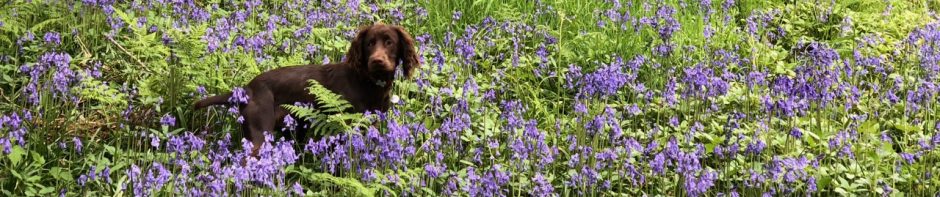
Bracken below Ben John
The eastern slopes of Barholm Hill had swathes of burned heather which was easy going underfoot. The lower slopes were unburned heather but lower still, there was first bracken then the dreaded marsh grass, and boggy ground. Too quick for my camera, a white bird rose from the bracken and as I wondered what it was, it flew around revealing itself as an owl.
Ben John itself is a relatively easy hill to climb, but has many minor bluffs to impede descent. Atop the hill the views were similar to those from Barholm Hill, but now Gatehouse, Sandgreen and the Glengap Hills were visible as well. I had hoped to see the Rutherford Monument from here but was disappointed. I should have looked more carefully, though, since I can see it in the photographs.
I had considered the Ben John diversion when planning the walk, and intended dumping my rucksack on Barholm Hill, then doing a there and back to Ben John. Once on Barholm Hill however it looked better to head directly from Ben John to Cairnharrow across the Whiteside Burn, so I kept the rucksack. The climb up Cairnharrow was slow due to the terrain, though a pair of deer ahead of me made short shrift of it. Barholm, Ben John and Cairnharrow form a culvert of sorts, so the lower slopes of Cairnharrow don’t offer much of a view. This tends to make one concentrate too much on the ground underfoot. I had chosen to climb to the left of a dyke, alongside the burn, but I wonder if the other side of the wall might have been easier. It did look greener on the other side of the wall.

Cairnharrow's Cairn
Eventually I made it to the summit of Cairnharrow where I found myself separated from the Trig pillar by one wall and the summit cairn by another. After clambering over one wall to the trig then over another I was at the cairn. Unfortunately I developed Elvis legs in the last few metres of climb so needed a bit of a sit down, with some lunch and coffee. The views here were impressive. The Machars were now becoming covered in cloud which I found myself looking down on, as if in an aeroplane, but the other directions were clear revealing Ailsa Craig in the far distance, but also the Minnigaff Hills, Clints of Dromore, Pibble Hill, Knockeans, Fell of Fleet, Cairnsmore of Dee, Cambret Hill and the Rhinns of Kells. Cairnsmore of Fleet dominated the view, a massive hulk despite being seen end on.

Cairn on Cambret Moor
Cambret hill with its TV transmitters lay ahead. I headed down the heather covered slopes aiming for the large cairn on Cambret Moor. Close to the cairn are the remains of a stone circle, best seen from the top of the cairn itself. From there I had about ten minutes wandering from one large stone to another, looking for more megalithic remains, then headed up to Cambret Hill. The transmitters gradually got closer, and I realised they were bigger, and so further away, than I had thought. I was definitely flagging by the time I reached the transmitters so it was time to stop, have some emergency carbohydrate and decide what to do.
Options: follow the original plan of walking down the road from Cambret Hill, along the military road to the stone circle near Glenquicken then along the path to Cambret farm; head straight across to the stone circle (saving 1.5 km); or miss out the stone circle and head for Cambret Farm (saving 3 km). After some chocolate I felt rejuvenated and decided that I shouldn’t leave out the stone circle. So I texted Mrs Drow ‘n’ Smirr that I was making slower progress and would be another two hours getting back to the car, then set off for Englishman’s burn and its stone circle.
This side of Cambret Moor proved relatively easy going. The tussocks were small and the many drainage channels were easily crossed. Englishman’s Burn would have been difficult to cross but someone had helpfully placed a sheet of corrugated iron over it. The Stone circle was well preserved, the best of those I had seen on the walk. A larger stone stands surrounded by a couple of dozen smaller stones, with Cairnsmore of Fleet as a background.

Stone circle near Englishman's Burn
From the stone circle I headed across another burn, climbed a fence then stopped to review the map since the expected path to Cambret Farm was nowhere to be seen. There is a cist marked on the map near here but I forgot all about it in my annoyance as I realised the path was back on the other side of the stone circle, meaning I would need to cross back over two burns. I couldn’t find the corrugated iron this time.
The path to Cambret Farm exists as a dotted line on the map but not on the ground, but twenty minutes or so had me at the farm. Here was a rotting sign which on close inspection read “Footpath” and directed me along a faint quad bike track that faded and reappeared.

Horse below Cairnharrow
Between Carsluith Burn and the next stone circle is a flat area which really fits the epithet “moor”. By now the sunlight was taking on the golden light of very early dusk giving the grass a rich hue. A black horse stood watching me as I passed and it had seemed so still at first that I wondered if it was a statue.
After the final stone circle there was another course choice to make. The original plan had been to climb Cairnholy hill but it looked much bigger with tired legs. I could take the track from Claughreid and follow the road back or cross the Kirkdale burn and contour the lower slopes of Cairnholy Hill. The latter saved 2.5 km and seemed a no brainer. It was the wrong choice.
I headed down to cross the burn but had waited too long and found myself climbing down the steep sided Cleugh of Claughreid. The burn was easily crossed here but there was a moss covered dyke at the bottom, too tall to see over and too slippy to easily climb. I should have taken the hint but instead I found a tree that had fallen on to the wall and clambered over. The far side of the Cleugh was steeper still and covered in slippy rotting leaves.

Cairnholy I
Once out of there all I had to do was walk back to Cairnholy Farm, but as it turned out I had twenty minutes of battling through thick tall braken ahead of me. I had thought the bracken was difficult, but it had nothing on the partially flattened bracken that caught my feet in every step. The clouds had by now settled on Cairnharrow and Barholm Hill, giving each a crown of cotton wool, but the lower slopes were still bathed in golden light. The chambered cairns at Cairnholy also looked different in the late evening light so I felt obliged to take a few more photos before getting back to the car.
The weather had been excellent, warmer than I expected and with good visibility. I don’t think this was a particularly difficult route, though the last section was a mistake. I may have found it hard because of being under the weather or perhaps adding Ben John, an extra 3.5 km and 200m of ascent, was a mistake.